
Table of ContentsJump to section
Samsung ke Galaxy phones mein ek dedicated button hota hai — pehle sirf Bixby ke liye tha, ab wo Side Key ya Power Button hai. Bahut log Bixby use nahi karte aur ye button waste lagta hai. Achhi khabar ye hai ki is button ko aap kisi bhi kaam ke liye remap kar sakte ho — camera open karna, flashlight toggle karna, Google Assistant, ya koi bhi app. 2026 mein Samsung One UI ne ye aur bhi easy bana diya hai.
⚡ Short Answer
Samsung pe: Settings → Advanced Features → Side Key → “Press and hold” action change karo. Bixby ki jagah Google Assistant, Quick Launch Camera, ya koi bhi app assign kar sakte ho.
Samsung pe: Settings → Advanced Features → Side Key → “Press and hold” action change karo. Bixby ki jagah Google Assistant, Quick Launch Camera, ya koi bhi app assign kar sakte ho.
Samsung Side Key Settings — Step by Step
- Settings app open karo
- Advanced Features pe tap karo
- Side Key option dhundho
- Yahan do settings hoti hain: Double press aur Press and hold
- Double press: Camera open, Quick launch (any app), ya Wake Bixby
- Press and hold: Power off menu ya Wake Bixby
Popular Remap Options
- Double press → Camera: Jaldi photo leni ho — double press karo, instantly camera khulta hai
- Double press → Quick Launch App: WhatsApp, Spotify, Maps — jo bhi sabse zyada use karte ho
- Press and hold → Power off menu: Easy restart/shutdown
- Double press → Samsung Pay: Tap and pay ke liye convenient
ℹ️ Model Ke Hisaab Se Alag Ho Sakta Hai
Older Samsung models (Galaxy S8, S9 era) mein dedicated Bixby button tha left side pe. Newer models (S20 onwards) mein ye power button ke saath combine ho gaya — Side Key settings same location pe milegi.
Older Samsung models (Galaxy S8, S9 era) mein dedicated Bixby button tha left side pe. Newer models (S20 onwards) mein ye power button ke saath combine ho gaya — Side Key settings same location pe milegi.
Bixby Button Ko Google Assistant Se Replace Karna
Google Assistant Bixby se popular hai India mein — isko Bixby button pe assign karne ke do tarike hain:
Method 1 — Built-in Setting (Newer Samsung):
- Settings → Advanced Features → Side Key → Press and hold → Digital Assistant
- Google Assistant select karo (agar installed hai)
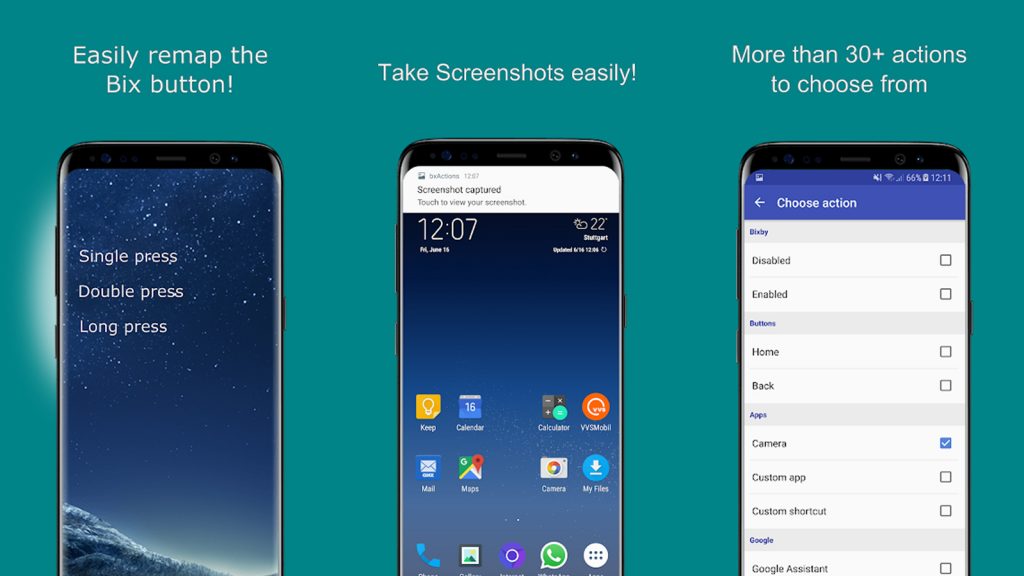
Method 2 — bxActions App (Free):
- Play Store se bxActions app download karo
- Iska free version bahut features deta hai
- Single press, double press, long press — teeno alag alag actions assign kar sakte ho
- Google Assistant, Flashlight, Screenshot — sab options available hain
⚠️ Bixby Disable Karna
Sirf remap karna kaafi nahi lagta? Bixby ko completely disable bhi kar sakte ho: Bixby app open karo → Settings → Voice wake-up OFF karo → aur app ko “disable” karo device settings se (Settings → Apps → Bixby Voice → Disable).
Sirf remap karna kaafi nahi lagta? Bixby ko completely disable bhi kar sakte ho: Bixby app open karo → Settings → Voice wake-up OFF karo → aur app ko “disable” karo device settings se (Settings → Apps → Bixby Voice → Disable).
Older Samsung Models — Dedicated Bixby Button (Galaxy S8/S9/Note 9)
Galaxy S8, S9, Note 8/9 mein left side pe alag Bixby button tha. In models mein:
- bxActions app best solution hai — free version mein Google Assistant assign kar sakte ho
- Single tap, double tap, long press — teeno customize hoti hain
- Samsung ne officially remapping allow nahi ki thi in models mein, isliye third-party app chahiye
✅ Bixby Remap Checklist
✔ New Samsung (S20+): Settings → Advanced Features → Side Key
✔ Camera shortcut: Double press → Quick Launch Camera
✔ Google Assistant: Press and hold → Digital Assistant → Google
✔ More control chahiye: bxActions app download karo (free)
✔ Bixby completely off: Bixby app Settings → disable
✔ New Samsung (S20+): Settings → Advanced Features → Side Key
✔ Camera shortcut: Double press → Quick Launch Camera
✔ Google Assistant: Press and hold → Digital Assistant → Google
✔ More control chahiye: bxActions app download karo (free)
✔ Bixby completely off: Bixby app Settings → disable
⚙️ Phone Ko Apne Hisaab Se Customize Karo
Wo button jo kabhi sirf Bixby ke liye tha, ab aapka koi bhi kaam kar sakta hai. 2 minute ka setting change, daily convenience mein fark padta hai.
Aur Samsung Tips →
Wo button jo kabhi sirf Bixby ke liye tha, ab aapka koi bhi kaam kar sakta hai. 2 minute ka setting change, daily convenience mein fark padta hai.
Aur Samsung Tips →